
How to Use an Audio Guide at a Museum: Step-by-Step
This post contains affiliate links. As an Amazon Associate, we earn from qualifying purchases.
To use an audio guide at a museum, rent the device (usually free, sometimes against an ID card), plug in headphones, select your language, then type the exhibit number and press Play. The device plays a recorded commentary track for that exhibit. Return it to the same desk to get your ID back.
That ID clause is the one that catches people. At the Seoul Museum of History, the audio guide page is blunt about it: you submit your ID card and fill in an application form with your name, mobile phone number, and the number of players, and you cannot rent a player without the card. No ID, no rental. No exceptions listed. If you are unsure how to use an audio guide at a museum, the staff can explain the process.
So the rental desk is where the trip either starts clean or starts with a walk back to the hotel. Everything after that, language, keypad, volume, the moment the battery light goes weird, is a five-minute learning curve on how to use an audio guide at a museum you can flatten before you walk in.
What follows covers the rental gate, the keypad, the language trap, the battery warning sign, and the model-by-model differences that make “how to use an audio guide” a different answer depending on which unit you’re handed.
Key Takeaways
- Bring a physical ID card if you’re visiting a museum that requires it, some venues hold it as collateral until you return the device.
- Language selection is not always recoverable, the FDR Library’s Tour-Mate requires a full power-cycle if you pick the wrong one.
- A glittery red charging light on an audio guide signals a battery fault, hand the unit back to the counter rather than struggle with it.
- Two users can share one device on units with dual jacks, like the FDR Tour-Mate and Orpheo Mikro LX.
- Plug in headphones before you start walking, the XP4 manual permits speaker use but asks visitors to use headphones out of courtesy to others, while the FDR Library’s Tour-Mate guide mentions only using the included on-ear headphones or your own.
How Do You Rent a Museum Audio Guide Without Losing Your ID?
The rental procedure is short, and the ID requirement is the part that stops people cold. At the Seoul Museum of History, you visit the Information Desk on the first floor, hand over your ID card, and fill in a form with your name, mobile phone number, and the number of players you’re renting. The rental itself is free.
The form is not optional paperwork. It’s the museum’s tracking mechanism, and your ID is the deposit. You get both back when you return the player to the same desk.
I see travelers treat this step casually all the time, and it’s the one museum procedure I’d put in bold on any itinerary. If your ID is sitting in a hotel safe across town, you’re doing the walk of shame before you’ve seen a single exhibit.
What most people get wrong: Assuming a photo of your passport on your phone will work. It usually won’t. The desk needs the physical card, because that’s what they’re holding until you come back.
Here’s the rental flow in plain order:
- Walk to the Information Desk (or the museum’s designated rental point) and ask for an audio guide. At the FDR Library, that desk is the New Deal Store inside the Henry A. Wallace Visitor and Education Center.
- Hand over your ID card if the venue requires it. At Seoul Museum of History, this is a hard gate, no card, no rental.
- Fill in the application form with your name, mobile phone number, and how many players you need.
- Take the device and check the headphone situation before you walk away. Some units come with on-ear headphones; some don’t.
- Return the device to the same desk at the end of your visit to retrieve your ID.
If the museum offers a mobile exhibition hall service instead, like Seoul’s QR-code system, where you scan tags on exhibits with your own phone, you skip the ID entirely. That service runs as videos and sign-language videos in Korean, so it’s not a full substitute for a multilingual audio guide, but it’s a zero-friction option if you read Korean or just want visual context.
What Happens When You Press the Wrong Language Button?
Language selection is the first real decision you make on the device, and on some units it’s also the first mistake you can make. Press the language button, scroll or press the corresponding number, and confirm.
Here’s the part that splits by model. The FDR Library’s Tour-Mate user guide states plainly that if you choose the wrong language, you have to turn the device off using the main switch, turn it back on, and repeat the whole process. There is no “back” button on that screen. Full power-cycle.
The Seoul Museum of History presents language selection as a simple button press with no such penalty. So the recoverability of a wrong language tap depends entirely on which unit is in your hand.
The Tour-Mate offers two languages: English and Spanish. The Seoul Museum of History offers four: English, Chinese, Japanese, and Korean. The Orpheo Mikro LX stores multiple languages on the device itself and plays the triggered commentary in whichever language the visitor selected.
Fair warning: If you’re handed a device with a physical main switch and a separate power button, treat the first language screen like a form you can’t un-submit. Get it right the first time, or budget thirty seconds for a reboot.
The Keypad Buttons Nobody Explains at the Desk
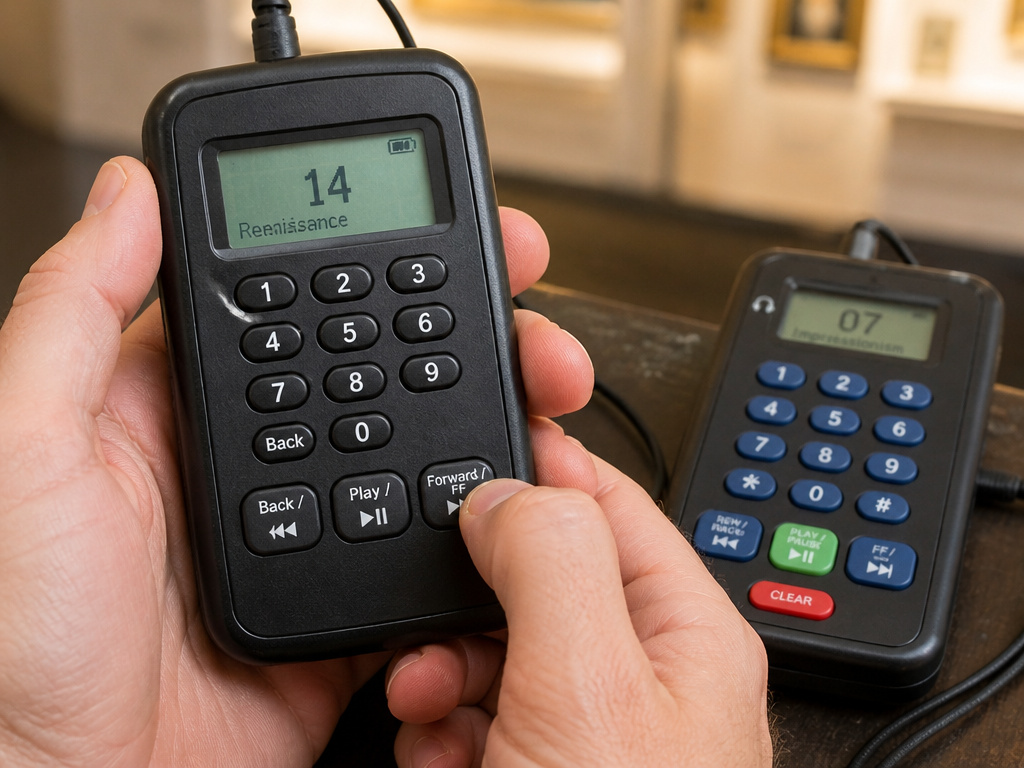
The desk staff hand you the device and point you toward the exhibits. They rarely walk you through the keypad, and that’s where most of the fumbling over how to use an audio guide at a museum happens in the first gallery.
The FDR Tour-Mate keypad has a numbered pad, a Back/Rewind button, a Forward/FF button, and a Play/Pause button. The mechanics are specific: to rewind or fast-forward within a track, you hold the button for at least one second until you reach the point you want. To jump to a previous or next track, you press the button without holding, repeatedly, once per track.
That distinction matters. Hold too long when you meant to skip a track and you’ve rewound halfway through the previous one instead.
| Task | Button | How to press it |
|---|---|---|
| Rewind within a track | Back/Rewind | Hold at least 1 second |
| Fast-forward within a track | Forward/FF | Hold at least 1 second |
| Jump back a track | Back/Rewind | Tap repeatedly, do not hold |
| Jump forward a track | Forward/FF | Tap repeatedly, do not hold |
| Jump to a specific track | Numbered keypad | Type number, then Play |
On the Seoul Museum of History unit, the layout is different but the logic is similar. You press the content number for the exhibit you’re standing in front of, then press Play/Pause to hear the overview. The LCD screen shows the name and number of whatever is currently playing. If you mistype a number, press the CLEAR button to delete it before you press Play.
To move through exhibits in order, say you’re walking a permanent gallery front to back, press PREV or NEXT rather than typing each number. That’s faster than keypad entry once you’re in rhythm.
Easy to miss: The FDR Tour-Mate screen dims automatically after 30 seconds. Press any key once to wake it, then use the device normally. If you assume the unit has died, you’ll stand there pressing buttons that aren’t registering yet.
What Does the Blue Light and the Charging Light Actually Mean?
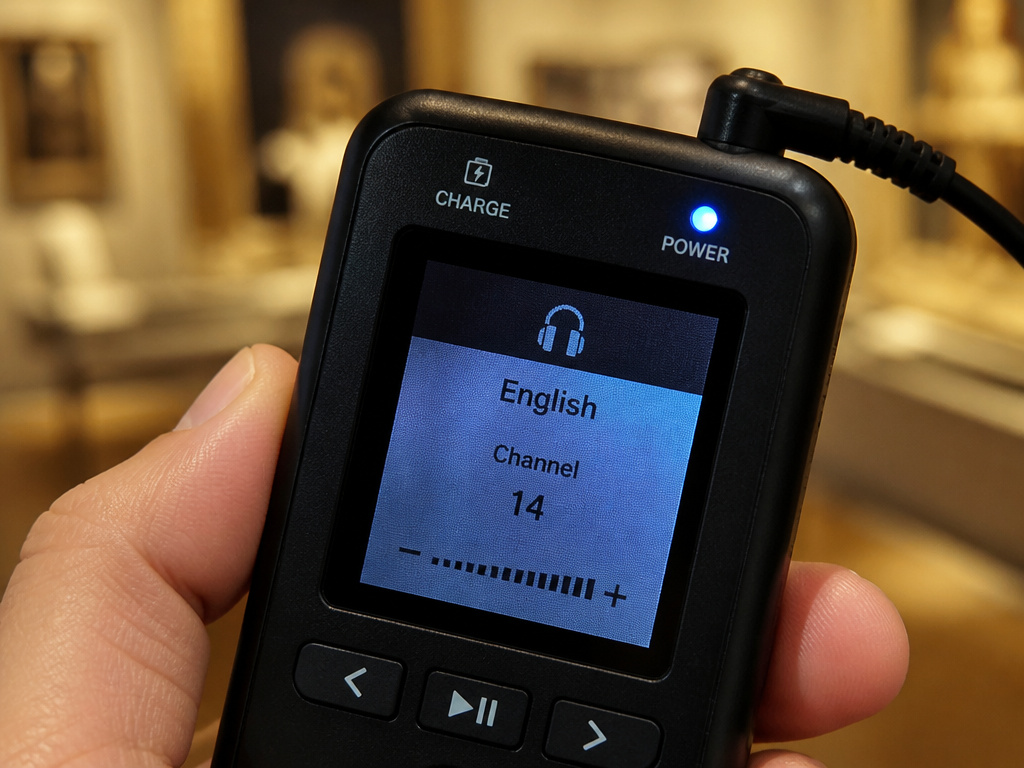
The indicator lights are the device’s only way of telling you something is wrong, and most visitors never learn what they mean. That’s a small thing until it isn’t.
On the FDR Tour-Mate, the BLUE LED blinks while the device is playing content and stays steady when it’s paused. That’s your at-a-glance status check: if you’re not hearing anything and the light is steady, you paused it. If the light is blinking and you’re hearing nothing, check your headphones.
That’s the kind of thing worth knowing before you’ve walked three galleries away from the rental point.
If you want the overview tour, press 1. If you want a specific stop, start from 2.
Do You Need Your Own Headphones for a Museum Audio Guide?
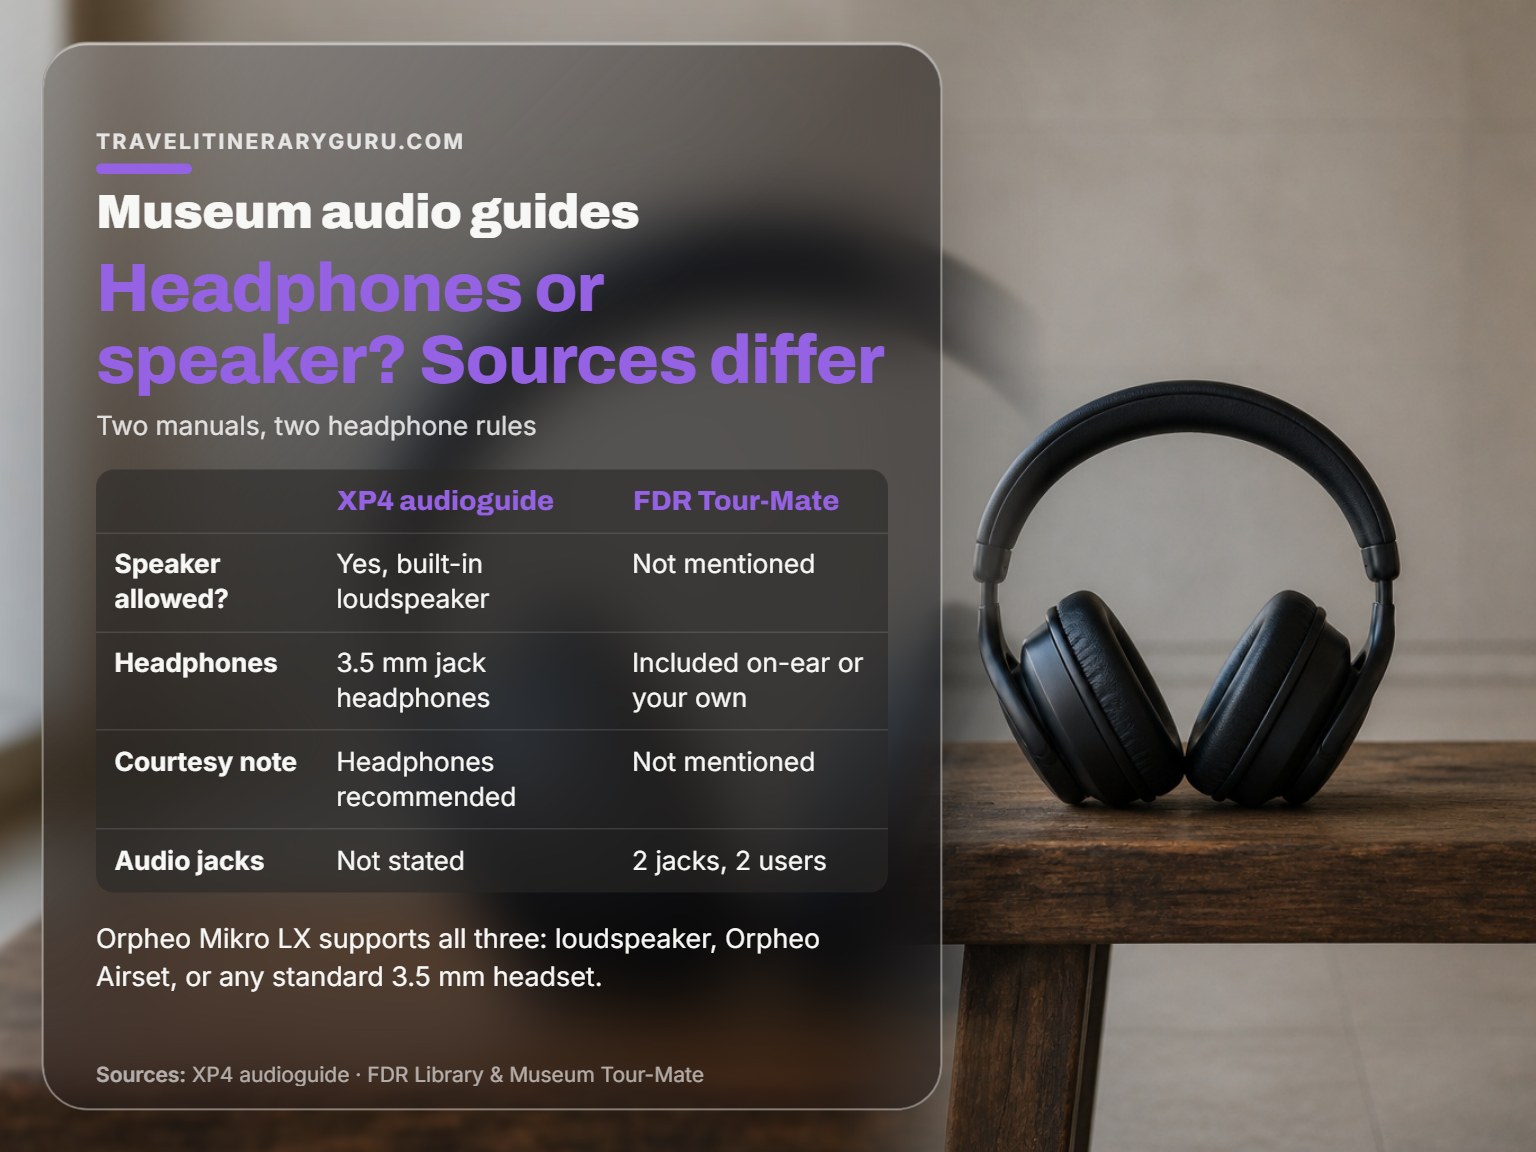
Headphone rules vary by venue, and the sources don’t agree on whether a speaker-only visit is acceptable. This is one of the places where the manuals genuinely conflict.
| Source | Headphone position |
|---|---|
| XP4 audioguide manual (Chorzów) | Speaker or 3.5 mm headphones; headphones recommended for other visitors’ comfort |
| FDR Library Tour-Mate guide | Use the included on-ear headphones or your own; no speaker mentioned |
| Orpheo Mikro LX product page | Loudspeaker, Orpheo Airset headset, or any standard 3.5 mm headset |
The XP4 manual explicitly permits speaker use and asks visitors to use headphones out of courtesy, while the FDR Library’s Tour-Mate guide mentions only using the included on-ear headphones or your own. The FDR guide doesn’t mention a speaker at all. The Orpheo Mikro LX supports all three options, with volume adjustable one-handed and per track.
Practical takeaway: bring your own 3.5 mm headphones if you have a pair you like. They’ll work on the XP4, the FDR Tour-Mate, and the Orpheo Mikro LX, though the XP4 manual also permits speaker use while the FDR Tour-Mate guide mentions only headphones. If you forget them, ask at the desk, some venues stock them, some don’t.
Skip this if: You’re visiting a museum that only offers a QR-code mobile service like Seoul’s. That runs on your own phone and your own earbuds, and there’s no rental device to plug into.
How Do You Turn the Device Off at the End of the Visit?
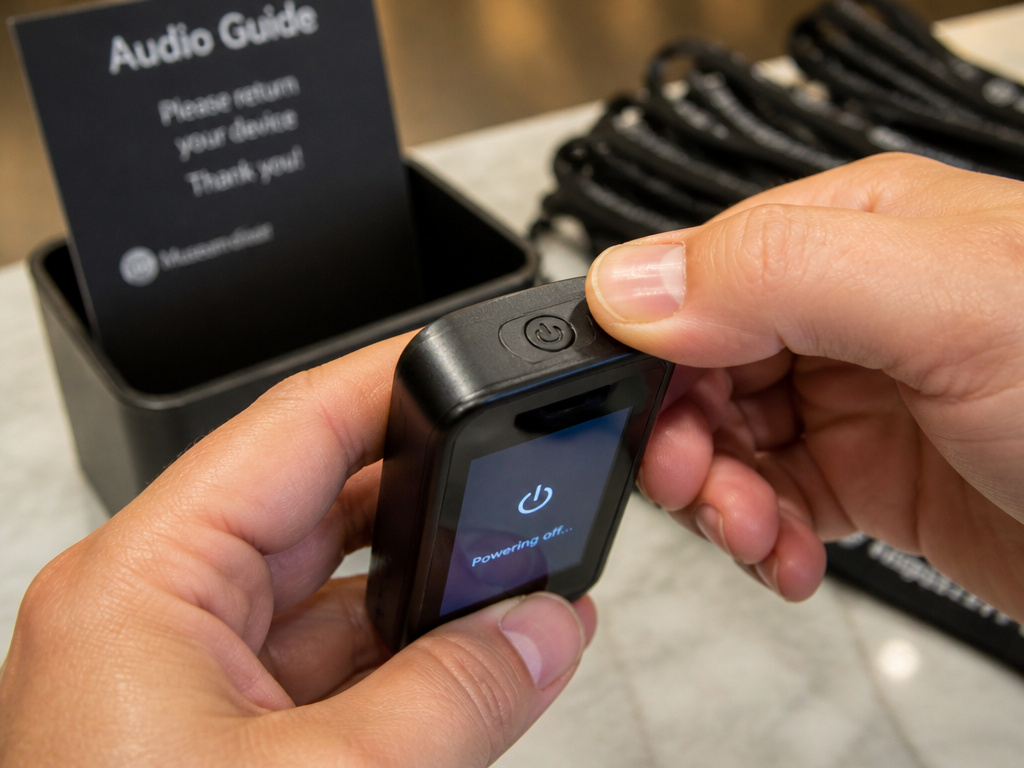
Handing the device back is easy. Powering it down correctly is where three different models do three different things, and the museum staff will notice if you just walk up with it still running.
The Seoul Museum of History unit powers off by pressing the Power button for about five seconds.
That’s three different shutdown models for the same nominal task. There is no universal procedure, and knowing which one you’re holding saves you a five-second standoff with the desk.
If you’re not sure, just hand it back powered on. The staff will handle it, and you’ll get your ID back either way. The bigger risk is walking off with the device still clipped to your belt loop, the XP4 manual explicitly forbids taking the device off museum premises, and that’s the kind of mistake that turns a pleasant afternoon into a conversation with security.
I tried a “self-guided” museum app at the Rijksmuseum once that was really just a paid audio guide with a map bolted on. I spent more time syncing Bluetooth than looking at paintings. The best museum audio experience I’ve had since then was a free podcast episode I’d downloaded before the trip, no app, no login, just a historian talking for forty minutes while I wandered. Which is the useful lesson here: the device in your hand is a tool, and if it’s fighting you, the museum’s own audio guide is usually the smoother path.
Frequently Asked Questions
Can I use my own headphones with a museum audio guide?
Yes, on units that take a standard 3.5 mm jack. The FDR Tour-Mate works with the included on-ear headphones or your own. The XP4 accepts 3.5 mm headphones or its built-in speaker. The Orpheo Mikro LX accepts any standard 3.5 mm headset. Bring your own if you have a pair you like.
What happens if I select the wrong language?
It depends on the device. The FDR Library’s Tour-Mate requires a full power-cycle: turn it off with the main switch, turn it back on, and repeat the language selection. The Seoul Museum of History treats language selection as a simple button press, so you can change it without rebooting.
Do I need to leave my ID to rent an audio guide?
Not at every museum, but at some. The Seoul Museum of History requires submitting an ID card and filling in an application form with your name, mobile phone number, and number of players. You cannot rent a player without your ID card. You get the card back when you return the device to the Information Desk.
How long is a museum audio guide tour?
It varies widely by venue and content type. The FDR Library’s Audio Description tour runs over 13 hours of narration, covering the permanent exhibit text and verbal illustrations of exhibit spaces, documents, artifacts, and interactives. Most visitors listen to a fraction of that. Check the tour length at the desk if you’re on a schedule.
Can two people share one audio guide device?
Yes, on units with dual headphone jacks. The FDR Tour-Mate has two audio jacks on the bottom edge, so two users with their own headphones can listen to one device at the same time. The Orpheo Mikro LX also comes with dual headphone jacks.
What does it mean if the charging light is a strange color?
The Bottom Line
One rule most guides skip: if you’re visiting a museum that requires an ID for rental, treat that card like your ticket. It’s the single point of failure in an otherwise simple process. Everything else, language, keypad, volume, the blue light, is a two-minute learning curve once you know what you’re looking at.
The manuals disagree on more than you’d expect. Headphone rules differ. Power-off procedures differ. Language-change recoverability differs. That’s not a sign the sources are wrong; it’s a sign that “museum audio guide” describes a whole family of devices, and the one you’re handed determines the answer.
So here’s the practical sequence. Before you leave the hotel, confirm the museum’s rental policy and whether an ID is required. At the desk, ask which model you’re getting and whether it has a speaker. If you’re handed a device with a main switch and a separate power button, treat the first language screen carefully. And if the charging light looks odd, walk it back before you’ve walked three galleries away.
The audio guide is a tool, not the visit. Use it well for the exhibits that need context, and put it down for the ones that don’t.
